

 Facebook
 Twitter
 Pinterest
 Copy Link
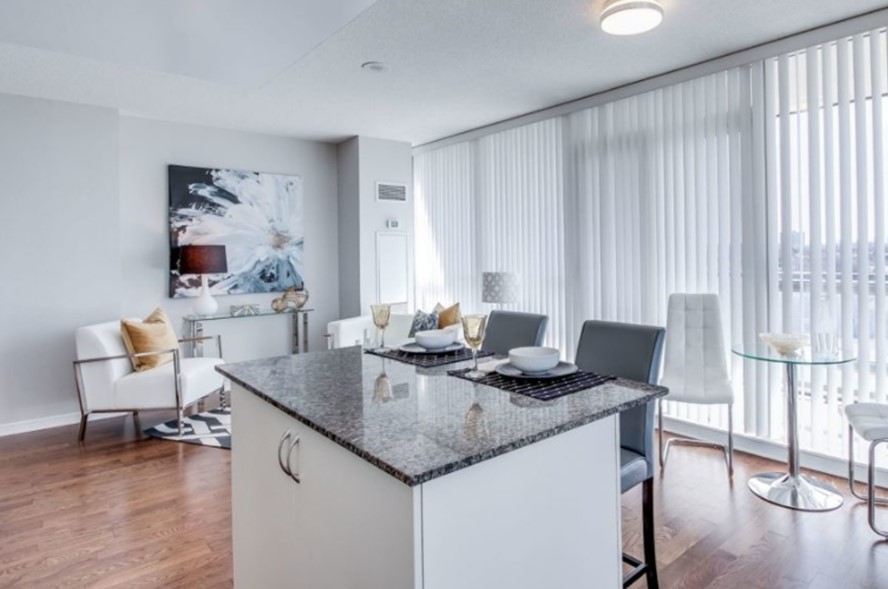
How to make your condo look and feel bigger

Making a condo look and feel bigger can seem like a daunting challenge, but really doesn’t have to be that difficult.
By following some of the same techniques used by the top interior designers, you can create a bright, open and airy space that not only looks and feels bigger, but also creates a more comfortable living area to call home.
There are a couple of things to keep in mind while you’re transforming your condo. Always keep it simple and within your budget, but also have some fun while you’re shopping and redecorating. Most importantly, make sure your personality shows through by choosing colors, décor and designs that you enjoy.
Looking at the Top 5 design techniques, start with those you believe will make the biggest impact on your home. You can pick and choose from there, based on the look you’d like to create.
Color Techniques
Professional designers know that light colors seem further away, and appear to push walls back, while darker colors appear to push walls toward you, making them feel closer than they are.
Light colors are also more reflective and will brighten the living area, making it feel more airy and that also has the effect of making the area look bigger.
Now that doesn’t mean you have to paint everything white (although you could). It just means that when looking to create a more expansive look, choose lighter, rather than darker colors. You still have plenty of colors and shades to choose from, like off-white, beige, light grey, and dusty blues and greens. These colors can also add a level of sophistication to your living space as well. Even more choices include pastel colors, citrus hues, and sea shades, which all work equally well.
After deciding on a color, try to carry that same color throughout the visible area to eliminate boundaries and create a more cohesive look. While color changes can help to define living areas, they create boundaries that cause the area to look smaller.
If you feel compelled to use different colors, try using different shades of the same color, or, you could use one wall as an accent wall and introduce a color or wallpaper of your choosing. Just be sure to stay within the same color palette. If you’re using a wallpaper, keep in mind that vertical patterns make a wall look taller and horizontal patterns make it look wider.
Designer Tip – Paint trim and moldings the same color as the wall or use a lighter shade of the same color to avoid creating boarders, or even a visually cluttered area.
Designer Tip – To create some excitement and liven up the area, add splashes of color by using strategically placed décor pieces or accent furniture. This will have the added benefit of creating even more depth to the area.
Designer Tip – If you have a long, narrow room, you can paint the long walls a light color making them feel further apart and use a darker color on the distant shorter wall to visually pull the wall forward. This will have the effect of making the room look more square and not as narrow.
Get Creative With Lighting
Not surprisingly, natural light works best for helping to create an airy, open and fresh look to any area. Unfortunately, that’s not always possible since… well, nightfall comes once a day and not everyone is blessed with big windows to let the sunlight in during the day.
That’s why professional designers use lighting strategies that both supplement the available natural light but also help provide the appearance of added depth and size.
First and foremost, work on letting as much natural light into your living space. Convert to sheer window coverings, pull them back or even eliminate them all together. This also has the benefit of connecting to and extending the room to the outside creating a limitless look. (Don’t forget to use a good glass cleaner on the windows). If the view isn’t great, use flowers or plants near the window to catch the eye before it views out.
The next step is to work on your interior lighting. Designers use a layered approach and never rely on one source of lighting as it will never fill the entire room with light. Your goal is to create even lighting throughout the space.
Start with a main source of light, like overhead lighting. This will fill most of the room with light but leave some areas and corners darker, which visually shrinks the size of the room.
Now work on filling those darker areas of the room. Accent lamps and track lighting can help accomplish this. Some good choices also include using built-in spotlights, flush-mounts, sconces, or even floor mounts.
Designer Tip – When using a hanging light fixture, like over a dining area, select a fixture that has a light and interesting look to pull the eye upward and create even more depth.
Designer Tip – Use dimmer switches to control the amount of light coming from each source. This will give you full control of the lighting effect you’re working to create.
Mirror Magic
One of the quickest and easiest ways to make a living area look larger and more open is the use of strategically placed mirrors. Even a small mirror, placed correctly, can have a dramatic effect in enlarging the look of your condo.
Mirrors reflect both natural and artificial light brightening a room and having the immediate effect of increasing depth and making the area look more open.
Start by looking at where you can strategically place mirrors in your home. Good starting points are areas of the room that are the darkest or are the most shallow. You’ll get the benefit of reflecting more light in the area as well as creating depth and the fell of a larger space.
Positioning a mirror where it will reflect the view through a window is another great technique for the bringing the outside in and making your home look more expansive.
Keep in mind, that when it comes to mirrors, the bigger the mirror, the bigger the effect, and if you can locate it as a focal point in the room, you’ll virtually double the effect. Look for opportunities to add larger, rather than, smaller mirrors. You’ll find plenty of options including using mirrored cabinet doors.
Designer Tip – Create a collage of different sized framed mirrors in one area of a wall. This will add an artistic flare while giving you the same benefits of having a giant mirror on that wall.
De-Clutter
Probably one of the least ‘fun’ items in this guide, but an absolute necessity if you want to make your condo look bigger is to get rid of the clutter.
Let’s face it, we all have too much ‘stuff’. Whether that ‘stuff’ is everyday items or treasured décor pieces, or a combination of both, nothing does more to make an area look overcrowded and small.
Tackling this is a two-step process and it’s easier if you tackle one room or area at a time, whether it’s the living area, a bedroom or even the kitchen.
First, it’s time to neaten and organize items that are currently in cabinets, closets, storage areas etc. The goal is to make room for more stuff to get put away. It’s a great time to purge those items you’re probably never going to use again and are taking up valuable space. Now it’s time to take a look at the ‘stuff’ that’s currently crowding your living area. Find ways to get as much of it out of sight.
Secondly, be creative in finding ways to create additional storage areas throughout your condo. You’ll find this easier than you think, and you have plenty of options. Some to consider include, decorative baskets to store items out of sight, skirts around tables where you can place items underneath and out of new, go vertical by installing shelving for keeping those items that you want to display in a neat and organized way, or even built-in furniture like a window seat with interior storage.
Don’t forget to make full use of your condo’s assigned storage unit (if you have one). Be disciplined about moving those rarely used items out of your living area and into the storage unit.
Designer Tip – Make this project a twice a year activity. The start of Spring and Fall are great times to do this as we’re pulling out and putting away seasonal items for the upcoming summer and winter months.
Flooring
Similar to the treatment used with walls, the goal with flooring is to create a cohesive look that runs through your living area. The use of different flooring in different areas of the condo will certainly help to define those areas but at the cost of having each area and the whole look small with many boundaries for the eye to focus on.
By using the same flooring throughout all areas, the eye continues to roam further and further giving the area a more expansive look. The obvious exception to this would be the bathrooms where you’ll likely need to use different flooring.
Whether you looking at hardwood, tile or carpeting, remember to choose lighter, over darker, colors since darker colors will make the space feel smaller.
If you’d still like to define certain areas of your living space, consider using area rugs. Be sure to choose the right size and don’t be afraid to go a little bigger than you may think. While it seems counter-intuitive, a rug that is too small will make the area look even smaller. Also, be sure to continue the thought that lighter is better than darker when making your choices.
Designer Tip – Don’t have area rugs tuck under sofas or other furniture. This has a tendency to tighten the area and make it look smaller.
Bonus Designer Tips
Bonus Designer Tip – When choosing furniture for smaller area, choose those with legs. This creates a more airy look and helps the area look more expansive.
Bonus Designer Tip – Keep a low profile throughout the condo. This allows the eye to roam further into the area and also creates a more expansive look.
Bonus Designer Tip – When hanging pictures or displaying art, create a collage of pictures in one area of a wall vs. having the pictures hung throughout the area. This creates a focal point that will draw the eye across the room. With regards to hanging art, opt for one big piece vs. several smaller pieces for the same reason.
Bonus Designer Tip – Choose bookcases or shelving that goes right to the ceiling. It’s very effective at creating the illusion of higher ceilings and more space.
Bonus Designer Tip – Make sure there is a clear pathway throughout the condo. Pathways that are interrupted by furniture make the condo look cramped and overstuffed.
Bonus Designer Tip – When choosing side or coffee tables, see if clear acrylic or a glass surface works for your décor. They offer the benefits and give the appearance of taking up less space.
Bonus Designer Tip – Liven up your living area by adding splashes of color by using colored throw pillows or colorful decorative pieces. Even a colorful accent piece looks wonderful.
Conclusion
As you can see, making your condo look and feel bigger doesn’t have to be difficult. It usually doesn’t require all of the steps listed above. Pick and choose those that will make the biggest difference for your living space. Most importantly, have fun doing it. It’s an opportunity to give a fresh look to some, or all of your home.
These tips come in handy when you’re buying or selling a home. If you’re selling, you can add value to your home by making it feel bigger than it actually is. If you’re buying, you can get a better sense of what you can create when you move in.
We post new articles weekly, so make sure you bookmark this blog to get the latest.
How to get the highest price for your condo
Getting the highest possible price for your condo sale is both a science, and an art. Doing it right can make a significant difference in the final sale price of your condo, how long it takes to sell, and how seamless the entire process is from beginning to end.
Many of the steps for increasing the value of your condo, are similar to those used for selling a house. On the other hand, marketing a condo unit correctly can be very different, and ultimately affect your final sale price for your home.
Unless your experienced in real estate marketing, this is where choosing the right real estate agent to assist you can make all the difference in the world.
I’ve included some of the top steps you can, and should, take to make your unit stand out from the rest and maximize the value of your home. If you have additional questions, or would like some help with your home sale, feel free to contact me directly. My contact information is below.
Get your Home Ready to Sell
Of course, a fully renovated condo will command a higher price, but unless an expensive upgrade is essential to the sale of your condo, you should avoid these costly upgrades. Many times, the cost of these outweigh the increased value it affords your unit. In these cases, save your money and use it on improvements to your next home.
Instead, focus on making improvements that bring you the greatest return, and highest price improvement, on your investment. The good news is, that many of these improvements are relatively inexpensive, and can be completed in a short period of time, as well.
Here are some of the lower cost items that typically yield the best improvement in price.
- Repainting with a neutral or white color
- Freshly caulking the bathrooms and kitchen areas
- Fix any leaky faucets
- Replacing light switch and outlet covers
- Make sure all light fixtures work
- Replacing doorknobs and handles
- Do a deep cleaning (especially those hard to reach places)
- Ensure windows are clean and sparkling
- Replace outdated appliances and light fixtures
- Replace carpeting and refinishing hardwood floors
A good realtor will do a thorough walk through of your home with you and advise you on the items that will be most affordable and create the best potential return for your efforts based on what features buyers are most looking for in your particular market.
Know your Condo Association’s Rules, Regulations and Fees
Surprisingly, this is one of the areas that I often see ignored by many condo owners and realtors, but is an area that can significantly influence both the price of the condo and the ease at which it is sold.
Typically, condos are managed by a Condo Association, known as a Homeowner’s Association (HOA) which sets covenants, conditions and restrictions (CC&Rs), or rules, which regulate, or place conditions, on certain activities, including the sale of your condo.
While most condo owners are aware of the CC&Rs of their association, many buyers are not. Some CC&Rs may be restrictive, but many others help protect the value and enjoyment of the property and help spell out amenities available as well.
Many HOAs have restrictions on items like; condo usage; right of first refusal; whether or not pets are allowed; where, if any, can you place a ‘for sale’ sign, etc.
Additionally, there may be rental caps, which a potential investment buyer would need to know, or even an Architectural Control Committee (ACC) which regulates modifications or alterations to the unit.
By conducting a detailed review of these documents, you can help the marketing and attraction of the unit by highlighting those that add to the lifestyle of the condo complex. Additionally, you can avoid having buyers back out at the last minute due to rules, restrictions, fees or assessments that they weren’t aware of when they made the offer to purchase.
Most contracts will include a contingency that allows the buyer to back out if review of the CC&Rs don’t meet their requirements, so having the documents available upfront will save a lot of time and headache later on.
Pricing Your Condo Effectively
Now that you’ve prepared your home to sell, selecting the price that will bring you the most number of offers at the highest price for your property will be key.
Some homeowners want to price their property high and well above the current market price. While this is within their right, and a few get lucky, the reality is that overpriced homes typically yield a lower final offer, than pricing the home appropriately.
Think about it from the potential buyer’s point of view. Over pricing a home makes it take longer to sell and often results in price reductions along the way. As a buyer, what are you thinking about a property that isn’t selling and the price keeps going down, especially in this hot market? If you’re like most, you would assume there is something wrong or defective about the property, causing less buyer interest, fewer showings and lower offers.
On the other hand, pricing too low may bring you a flood of potential buyers, but may not achieve the highest price possible for your condo.
This is where the expertise of a good real estate agent can really help. They will…
- Perform a ‘competitive market analysis’ for your property to see what similar condos in the area are selling for.
- Assess both the current supply and the demand for similar units in the area
- Factor In the price impact of the following, in addition to the location and condition of the unit
- Number of bedrooms and bathrooms
- Total square footage of living space
- The floor number the unit is on
- Amenities available and proximity to areas of interest
- Views from the condo, and more
By pricing your condo effectively, you can drive the greatest amount of interest and potential buyers to visit the property and encourage the most amount of competition to potentially drive the price even higher.
Effective Marketing
Effectively marketing your home requires much more than putting a sign up and adding your condo to the local MLS system. This is where a great agent will make the biggest difference for you.
A great agent will take the time to assess and inventory the specific characteristics and selling points of your condo, its amenities and the location and community, to develop a comprehensive marketing strategy for your home.
Aligning the features offered by your condo with those that are currently most desired by buyers, creates the most amount of interest and prospective offers on your home. Some of these include:
- Location as it relates to points of interest, shopping, public transportation or highway access
- Lifestyle Amenities provided by the association including a pool, tennis courts, fitness center, etc.
- Parking, landscaping, yard access, maintenance provided and more
- Unit features like new appliances, upgrades, extra storage and location within complex
- There are too many to list here, but these should give you a good starting point
The next thing a great agent will do is determine the best method to create maximum exposure for your condo and its highlighted features, to the greatest number of potential buyers.
This starts with using a professional photographer and copywriting to show off your home’s best features, and developing a comprehensive digital, social and email marketing campaign that reaches the greatest number of buyers most likely to be interested in purchasing your condo. Brokerages that have a wide-networks of agents can also increase the exposure of your home.
Getting and Keeping your Home ‘Show Ready’
If you’ve priced your condo appropriately and marketed it effectively, you should begin to see potential buyers looking to see your home in person. It’s critical to put your home’s ‘best foot forward’ when buyer’s view your home.
We’ve already covered items like painting, cleaning, etc., but there are a few other items which need to be discussed to make your home be even more appealing, stand out from the rest and have buyers envision themselves living there.
- Declutter – This is often more important when selling a condo vs. a house, since condos typically have less living space. This includes all rooms, countertops, closets, storage areas, etc. Most buyers are looking for enough space for themselves and their families to live comfortably. You don’t want anything that minimizes the available space offered by your unit.
- Remove Personal Photos & Memorabilia – This may sound counterproductive, buy while these items will often give YOUR home a more warm and cozy feeling, you want potential buyers to envision it as THEIR home. Your best bet is to pack up these items early and get them ready for your new home.
- 30 Minutes to Showtime – Once your home is listed, you could receive requests to see your home at any point during the day, and sometimes with short notice. It is strongly encouraged to be as accommodating as possible in showing your home. Many buyers are from out of town or have limited time to view homes. You can minimize the inconvenience by making sure your home never has more than 30 minutes of tidying up before the buyer arrives. You’ll be surprised that It’s much easier to do once you’ve decluttered your home.
Conclusion
Getting the highest price possible for your condo sale shouldn’t be taken lightly. It requires a level of knowledge and expertise from a trusted agent, and a partnership with the homeowner to work together to a successful transaction.
If you’d like assistance with your own condo sale, feel free to contact us directly. We’re committed to offering our clients the ultimate professional support, expertise, 5-Star Service and side-by-side partnership throughout the process and beyond.
Avoid These 5 Common First-Time Homebuyer Mistakes

The prospect of buying your first home is both exciting and nerve-wracking. On one hand, owning your own house is the final step of financial independence. You’re no longer accountable to a landlord and their rental agreement. On the other hand, buying a home is a huge financial decision that will determine where you live for the next several years.
As a first-time buyer, there’s a lot to learn about buying a house. You’ll often hear homeowners say, “I wish I knew that before buying this house.” So, in this article, we’re going to give you some common mistakes that first-time buyers make so you can have the best possible experience in the home buying process.
1. Underestimating the costs
When first-time buyers get preapproved for a mortgage, they sometimes see this as permission to spend whatever amount they’re approved for. However, even after closing costs, there are a number of other expenses you’ll need to account for in your budget.
You’ll be responsible for maintenance, utilities, taxes, and repairing things when they get old. If all of your money is tied up just paying your mortgage and other bills, you won’t have anything left over to maintain your house.
Furthermore, living your life just to make your mortgage payments is draining. Instead, buy a house that gives you enough room to save for retirement, vacations, a family, or whatever else you see in your future.
2. Prequalify first
Before you start shopping for homes, make sure you meet some basic prerequisites. You’ll need a solid credit score, steady income history, and money saved for a down payment. You might set yourself up for disappointment looking at homes that are outside of your spending limit if you don’t get prequalified first.
3. This probably isn’t your last home
While it’s okay to dream about the future, don’t set unrealistic expectations for your first home. You can always upgrade later on, and building equity in your first home is a good way to help you do that.
4. Don’t get too attached to your “dream home”
So, you’ve been shopping around for a few weeks and finally found the perfect house. If everything goes well your offer could get accepted. But if it doesn’t, don’t worry about it. There are constantly new houses appearing on the market, and there’s a good chance you’ll like one even more than this one.
5. Don’t waive contingencies without good reason
Contingencies are there to protect you. They might seem like a way to needlessly complicate a contract. Or, you might think that waiving them makes you look better in the eyes of the seller. However, both sellers and their agents know that contingencies serve an important purpose.
The three main contingencies you’ll want when buying a home are an appraisal contingency, financing contingency, and an inspection contingency. Unless you’re buying under special circumstances, you’ll want to keep all three in your contract.
How to Keep Your Pets Happy While House Hunting

Photo by Samson Katt from Pexels
Before finding your perfect house, you’ll undoubtedly visit at least 10 different properties for a good look around. If you’re navigating through a seller’s market, that number could increase considerably. All the while, your pet is likely waiting impatiently for things to return to normal, so they can enjoy having you home more often. Thankfully, you can make the process easier on them by using these tips to keep your pets happy while house hunting.
Wear Them Out Before You Go
A tired pet is a happy pet, so make sure to get them running and playing hard before you go. Try to get in at least 30 minutes of physical activity to wear out all their nervous energy and get them ready for a rest.
If you can incorporate fun brain games into the mix, like hide and seek, then they’ll be even more worn out by the time you’re done playing around. If you don’t have room for your pets to stretch their legs, play a little bit of fetch in the front room and roll out the puzzle games for an intense thinking session.
Hire a Trusted Pet Sitter
Most pets are not wild about being left alone for long stretches of time. They prefer a bit of company even if they are just loafing around the house. By hiring a pet sitter, you can keep them from getting lonely, while ensuring they get all their meals and potty breaks on time. You can even have the sitter take your pet on a walk around the neighborhood if you want to come home to a truly tired out pet.
Bring Home a Sweet Surprise
Pets absolutely love getting new toys and treats, so bring them home a sweet surprise after lengthy house hunting sessions. You could even stock up for future trips to avoid having to go to the pet store after every run. With that move, you’ll have a trunk full of goodies to share with your pet. If you find a house sooner than you thought, you can give them the rest as a housewarming gift.
Go on a Fun Outing When You’re Done
Although you cannot clearly explain to your pet why you’re away so much, you can make it up to them by going on a fun outing when you’re done. You could take them for a walk on a beach, go to a new park or hike through the woods for the afternoon.
Whatever you choose, make sure to bring along plenty of water and treats to keep your pet’s energy levels up while you’re out. If you want to make the trip even more memorable, stop by the pet store and let them pick out a new toy or treat.By using these tips before you head out for yet another round of open houses, your pet will look forward to your outings. You’ll notice far fewer stress signals as you get ready to go plus return to a happy pet.
Real Estate Technology: 3 Trends on the Rise

Technology enhances our lives in new and once-unimaginable ways. The real estate business is one that’s benefited from some of these technological advances, as our needs and priorities have changed during the last decade. Here are some of the most important emerging trends in real estate technology today:
Artificial Intelligence
Artificial intelligence (AI) is the backbone of the most common technology we use today. AI powers everything from simple calculators to smartphones and tablets. Some of how artificial intelligence is making waves in modern real estate is with communication between clients and professionals. These tools aid in more effective communication between agents, buyers, sellers and other agents looking to efficiently communicate during various times or availability.
Virtualization
Virtual reality has been an essential tool for real estate in the last few years. With increasing concern and awareness of health and safety, virtual tours have become a mainstay in the industry. While many virtual tours are videos—either taken by agents themselves or produced by marketing studios—virtual reality technology has made it possible for potential buyers to navigate a property from their own home. Even live video conferencing is an example of virtualization being used in real estate, from Zoom calls with clients to larger presentations on social media.
Augmented Reality
While augmented reality has seen the biggest increase in the design world, it is continuing to increase in popularity in the real estate sector overall. Augmented reality tech allows you to experience a virtual setting and interact with it dynamically. For example, interior designers and clients alike can use augmented reality tools to test new paint colors or visualize renovations before they happen. Home builders can build a virtual custom home with client input in real-time. Augmented reality is another tech trend making real estate more efficient and more effective for everyone involved.
Another Property Sold – 30 Ridgetop Drive, Tomkins Cove, NY 10986

Live in beautiful Tomkins Lake Colony in this fully RENOVATED (2021) solid brick ranch contemporary, with private lake, swimming/lifeguard, boating/clubhouse only 1 hr from NYC. Flooded with natural light, it offers soaring elegant open spaces and an all new fully updated interior and exterior, including high end new kitchen w/ granite and stainless appliances, new updated bathrooms, new roof, deck, and much more, totaling 3522 square feet of finished living space. 4 bedrooms on the main level and 2 large finished flex rooms in the second story. Enjoy the new central air system on hot summer days when you return from the lake, and get cozy by the stone fireplace on winter nights. Large formal living room and separate dining room with vaulted ceilings throughout, create a gracious lifestyle for easy entertaining. Beautiful newly refinished hardwood floors complete this stunning interior!
Minor Bathroom Remodeling Ideas
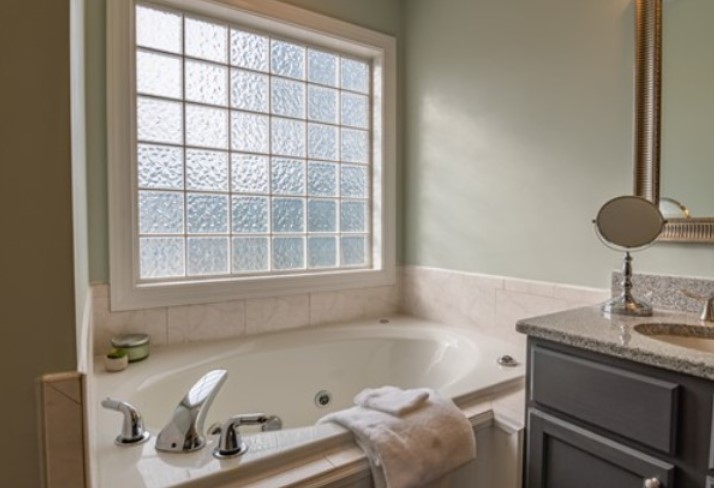
When you want to fix up your bathroom without having to spend a lot of time and money, simple changes are the way to go. Remodeling projects that are smaller in scope can boost your home value and enhance your bathroom’s appearance while being budget-friendly and less time-consuming. Whether you want to make several minor changes to your bathroom or just a few, the following projects are easy ones to consider doing.
Refinish the Tub
When your bathtub has seen better days, you don’t have to replace it with a new one, which is both a costly and complex project. Instead, you can refinish your tub to remove stains, discolorations and other flaws. Refinishing your tub gives it a fresh appearance without the worry of needing to have plumbing work done, as you would when having a new tub installed. You can refinish your tub on your own using a DIY kit or have your tub refinished professionally. Either way, you’ll have a tub that looks as good as new again.
Replace the Faucet
Giving your bathroom an updated look doesn’t have to involve replacing the entire sink. An easier and faster way to remodel is replacing the faucet only. Putting in a new faucet can spruce up your sink and bathroom overall, especially if you’re replacing an older one. Keep in mind that you’ll need to choose a new faucet that fits your current setup, For example, you’ll need to choose another single-hole faucet if that’s what you currently have. Changing to another faucet setup would mean having to replace the sink so it fits. When choosing a finish for your faucet, consider brushed finishes for easier maintenance or polished finishes for a more elegant look.
Switch to a Low-Flow Shower Head
A slight change that can have a big impact on your utility bills is changing to a low-flow showerhead. These showerheads reduce the amount of water you use when taking a shower, which can add up to significant savings. Having a low-flow showerhead can also help increase your home’s value. When choosing a low-flow shower head, you can look for unique features, such as massage settings, rain settings and mist sprays.
Refinish Bathroom Cabinets
Bathroom cabinets that show signs of wear and tear or have an older style can make your bathroom look less attractive overall. Completely replacing these cabinets is an extensive project that can end up being expensive. Instead of replacing them, you can give them a new finish to make them look new again. When choosing a finish, look for one that complements your bathroom counters or contrasts with them for a dramatic effect. You can also choose to paint your bathroom cabinets rather than refinish them to spruce up their appearance.
Install Wainscoting
If your bathroom walls are looking somewhat plain, you can dress them up with wainscoting. Adding wainscoting to the lower part of bathroom walls can enhance the room’s appearance while protecting your walls from water damage. You can install wainscoting that goes all the way around your bathroom walls, including the walls around your tub if you have a freestanding one. Wainscoting can blend in with the rest of your bathroom or have a different tone that adds some color for visual interest.
Add Light to Your Home With Eco-Friendly Solar Tubes

Does your home have a dark space that could use a little natural light? A solar tube could be the answer. Solar tubes provide a source of natural light in areas where extra windows and skylights aren’t options. Solar tubes are typically less expensive to install than skylights, too. This makes them a popular alternative for homeowners who have limited home-improvement budgets.
What Is a Solar Tube?
Your contractor may be more familiar with other common terms for solar tubes such as sun tunnels, tubular skylights, or daylight tubes but they all describe the same feature – a type of metallic tunnel that connects your space with your roof’s exterior. Usually around 10 to 14 inches in diameter, the interior of each tube is reflective. It collects the light that passes through a plastic dome on your roof and reflects it through the tunnel to your interior fixture. Before the light enters your home, it passes through a diffuser which softens and disperses it. In this way, a solar tube can function more efficiently than a skylight.
What Are the Benefits of Solar Tubes?
The benefits of solar tubes are many. Not only are they a cost-effective way to brighten a dark room, but they’re energy efficient, too. They’re powered completely by the sun and contribute zero dollars to your utility bill. They provide warm, natural light that’s a good source of vitamin D. They’re easy and economical to install as well. The average cost of adding a skylight could be as much as $2,000. Comparatively, a solar tube typically runs between $500 and $1,000.
One of the biggest benefits of solar tubes is that they work where other options won’t. If you have an attic above you or limited exterior roof space, a skylight may not be possible. Solar tubes are small enough to fit in cramped spaces, and their tunnel-like designs pass easily through attic spaces.
How Much Light Will I Get from a Solar Tube?
Solar tubes come in several sizes. According to EnergySage, if you purchase the 10-inch tube, expect the same amount of light you would get from about three 100-watt light bulbs. If you opt for a 14-inch tube, you can expect enough illumination to brighten a space approximately 300 square feet in size.
There are some limitations to solar tubes, however. They won’t shine as brightly on overcast days or during winter. They also don’t provide the view of the sky that a skylight offers. Still, they’re free to operate, and once you have one professionally installed, it’s basically maintenance-free. There are even DIY kits you can buy if you feel confident enough to install a solar tube yourself.
If you’re searching for an affordable way to bring more natural light into your living space, consider investing in these tubular skylights. Not only are they affordable, but they’re eco-friendly and suitable for most spaces, even the smallest and darkest corners of your home.
Integrated Tech: Adding A Programmable Thermostat to Your Hub

Photo by Anete Lusina from Pexels
As you go about your day at home, you might change the thermostat settings more than once to balance your comfort with saving money. But what if you were able to leave all that fine-tuning to a digital system and achieve your goals with little to no effort on your part? Well, if that sounds like a fantastic plan, you’ll love to see what a programmable thermostat has to offer. And you’ll likely delight in learning that new home builders are installing these smart devices more often than not. Here’s what you need to know.
How Do Programmable Thermostats Work?
When you have a programmable thermostat hooked up, you can tell it to alter the temp settings for the heat or air conditioning at specific times throughout the day. Then, it will kick the heating and cooling on as instructed to perfect the temperature in your home.
Do you like it chilly at night, but warm all day? You can do that. Or you can have it turn down the thermostat when you’re not home and kick it on full blast an hour before you’re set to return. You can also change it up season by season to keep your home comfortable while minimizing what you pay for energy.
No matter what settings you want, you can input your preferences right on the interface or through an app on your smartphone. If you have an app-linked device, you can even make changes while you’re away from home.
Benefits of Using Smart Thermostats
With a smart programmable thermostat installed, you get to enjoy all the following benefits.
Save Energy
You can save a lot of energy using a programmable thermostat. You just need to set it to 68 degrees all day, and then have it automatically turn down to around 66 degrees at night. Then, before you get up in the morning, it can bring the temperature up to 68 again to help you wake up right. You’ll likely notice your home’s energy usage decreasing, helping minimize your household’s carbon footprint.
Keep Bills Low
By using your smart thermostat to keep your home at 68 degrees or so all day and even lower at night, you can enjoy saving up to 10% per year on your energy bill. If you pay an average of $2,400 per year on energy, you’ll likely see a savings of around $240 just from setting your thermostat at the right level.
Stay Comfy
When you dial in your temperature settings around the clock using a programmable thermostat, you get to stay comfy without having to make manual adjustments. You’ll know that your heating and air conditioning systems will kick on at just the right moment to bring your livings space to your ideal temp. You may even wake up feeling more rested than ever before as the lower nighttime temperatures improve your sleep quality.
Protect Pipes
If you’re away from your home for days at a time in the winter months, you may worry about the heat turning off and allowing your pipes to freeze. Thankfully, with an app-connected smart thermostat on hand, you can check that your heater is running day and night.
With all these benefits in mind, it just makes sense to only use a programmable thermostat in your home.
Tips for Using Your Programmable Thermostat
When using a programmable thermostat, you’ll want to set a precise temperature for at least four separate times.
Preferably, set up a temperature for when you:
- Wake up each morning
- Leave the house for the day
- Return home after work or school
- Go to bed at night
By doing so, you can enjoy all the benefits of having a smart thermostat on your side. You may need to try out different temperatures to best balance your energy bills and comfort. But rest assured that it’s well worth the time and effort in doing so.
How to Winterize Your Home
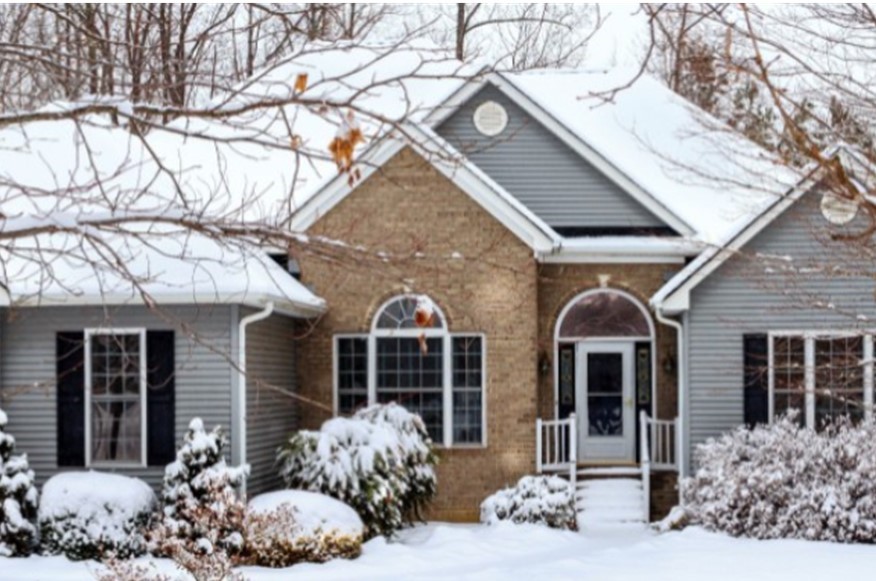
With winter quickly approaching, bringing along with it, freezing cold temperatures, snow, freezing rain, ice and more, it’s important to take some time to winterize your home.
Taking a few steps before winter arrives, will help you avoid some unnecessary and potentially costly repairs, and protect your investment in your home.
And with rising energy costs, you’ll be able to better reduce your heating bills by keeping the cold out and the warm in, throughout the season.
Clean Out Your Gutters

Leaves and debris tend to find their way to your gutters during the fall and if not cleared out, can result in water and ice dams forming during the winter.
This can lead to water backing up under your roof tiles and causing damage to your roof and water leaks in your home.
Schedule cleaning out your gutters right after the last leaves fall in autumn so that rain and melting snow can drain properly.
Check Your Roof

Do a quick visual inspection of your roof to see if it’s ready to withstand the harsh winter weather conditions on their way to avoid leaks or damage from melting snow.
Look for shingles that may be damaged, missing, frayed or curled. Also look and have them repaired or replaced. Also look for damaged flashing, clogged valleys and debris that may have accumulated on the roof.
While you’re at it, check if there are branches hanging over your home that may fall when covered with heavy snow.
Weather Stripping
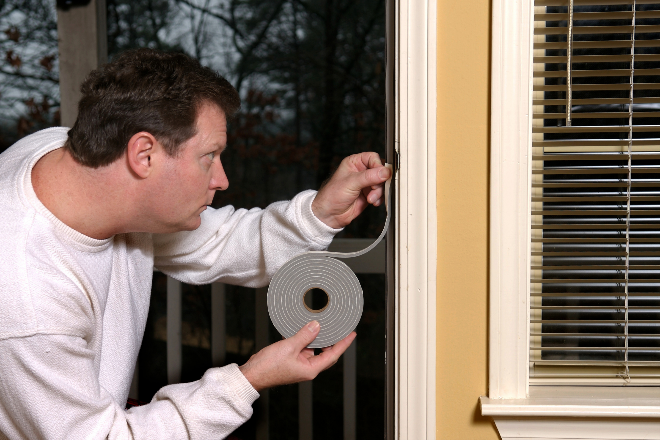
Worn or damaged weather stripping around doors and windows can be a major cause of heat loss during the cold winter months, leaving you both feeling chilly and with higher home energy costs.
Repairing and replacing worn weather stripping is inexpensive way to keep the ‘warm in’ and the ‘cold out’ and is relatively easy to do the for the do-it-yourselfer.
Don’t forget to also check the weather stripping around your sliding glass doors and the doors leading to the attic and basement as well.
Seal The Leaks

We’re talking about ‘air’ leaks here. You’d be surprised at the number of places your home can be ‘leaking’ warm air and letting cold air in.
Check the areas where the glass meets the window frame and above and below the windowsill. You may just find a small breeze coming through a slight crack in the seal there. You can either caulk the area or use specialized tape to seal the crack.
Also check your outlets and switches for drafts. You can use a foam insulation made specifically for this purpose to stop those leaks as well. Be sure to carefully follow the instructions.
Replace HVAC Filters

Your furnace will already be working overtime to keep your home warm during this winter. Dirty filters obstruct air flow and cause your furnace to work longer and harder to heat your home causing additional strain on your system as well as higher energy bills.
Filters are relatively inexpensive, should be changed about every three months and can be bought at virtually any home improvement store.
Ideally, this is a great time to contact your HVAC professional and give your system its annual servicing and tune up.
Service Your Fireplace, Flue and Chimney
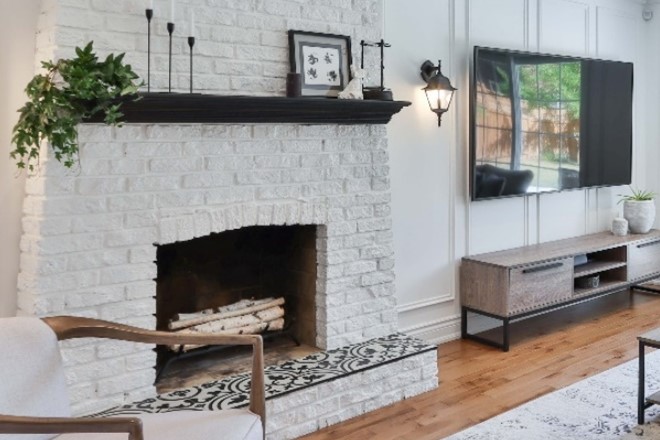
Every year thousands of fires are caused by creosote buildup, debris and even animal nests blocking a chimney. It’s important to always have a chimney sweep and service conducted before the first time you use your fireplace for the season.
When not in use, remember to close the flue to avoid unnecessary loss of heat.
If you’re not going to use your fireplace at all this season, consider options like a ‘chimney balloon’ to create a tight fit in the flue to keep the warm air in and the cold air out.
Install a Programable Thermostat

Estimates are that you can save up to 1% in energy costs for every 1 degree in lower temperature settings.
By installing a programable thermostat, you can set the temperature down a few degrees while you’re at work and have it automatically reset before you even get home.
You’ll be saving money and your home will be nice and cozy again by the time you get back. The recommended winter setting is 68 degrees Fahrenheit while you’re home.
Rotate Ceiling Fans Clockwise
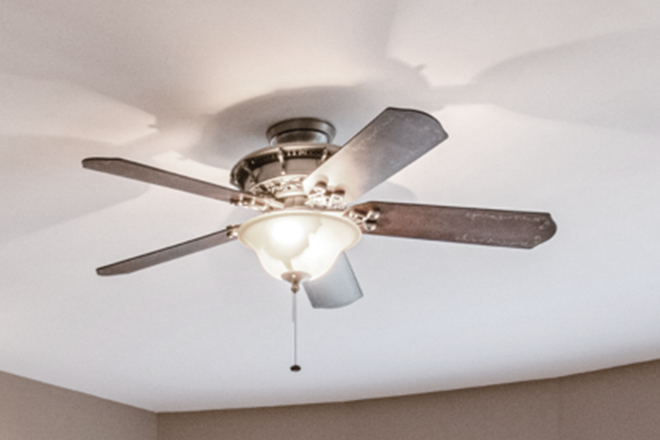
Almost everyone, including yours truly, forgets to do this one going into the winter.
Ceiling fans have two settings controlled by a small switch usually on the side of the base.
For winter months, you want your fan to rotate clockwise so it pushes the warm air, that rises, back down to your living space.
Store Your Summer Items

Snow, ice and cold temperatures can wreak havoc on your outdoor furniture, grill, equipment and accessories.
Take the time to bring them in and store them in your basement or garage so you don’t have to buy replacements next summer. If that’s not possible, at least buy some covers to protect them from the elements.
Don’t forget any accessories or trinkets displayed outside. Not only can they suffer damage as well, but they can become projectiles in strong windy storms.
Check, Test & Stock Up

We’ve all been there. The first snowstorm arrives, and you can’t get your snowblower started or don’t have an ice scraper for your car. Avoid that this year, and make sure you’ve stocked up on necessary supplies.
Check that all items you’ll need are on hand, accessible and in working order
- Snow Shovels, Ice Scrapers, Ice Melt, Battery Powered Weather Radio, Flashlights, First Aid Kit, Gloves, Hats, Boots, etc.
Test any systems you’re going to count on to start up and work during the winter season
- Snowblowers, Generators, Heating Systems, etc.
- Don’t forget to check the oil and your gas supply
Stock Up on items you’ll need if a storm hits and stores close early, roads are impassable, or the power goes out (Ideally, you should have at least a 3 day supply)
- Bottled water, canned food, cereal, snack foods, energy bars, pasta, coffee, tea, and paper goods like toilet paper and paper towels
- Baby food, baby formula, diapers
- One week supply of prescription medications and supplies
- Pet food and pet medications
- Batteries, power banks for your phone, can opener, thermal blankets
Conclusion

Winter is a time where ‘hoping for the best, but preparing for the worst’ is the best philosophy to follow. Taking a little bit of time to get ready, you can leave the stress behind, knowing you’re prepared for just about anything winter will bring.
Instead of worrying about the upcoming storm, you may actually find yourself looking forward to a little time off and playing in the snow with your family and friends.
Have a great and safe winter and happy holidays to each of you!


